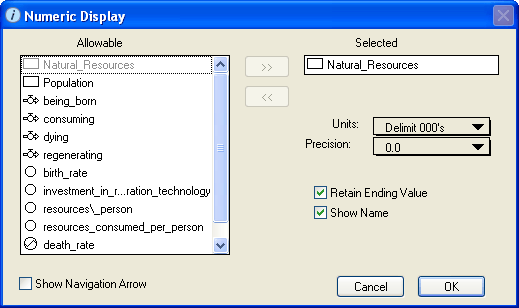
Use the Numeric Display dialog box to view and edit the properties of the selected numeric display.
To open the Numeric Display dialog box, double-click the numeric display icon on the Interface layer, or select the numeric display and then choose Open Selection from the Interface menu (or right-click the numeric display icon and then choose Open from the menu that appears).

Displays the list of all entities that are available to be assigned to the numeric display.
Use this list to select the entity that you want to associate with the numeric display you are defining.
 button. The entity's name turns gray in the "Allowable" list.
 button.
 button.
Tip: If the "Selected" or "Allowable" list has multiple entities, use drag-select, SHIFT+click, CTRL+click (Windows), or Command-click (Mac) to select multiple entities in either list.
Displays the name of the entity that is associated with the numeric display.
Select the units that you want to use when displaying the entity value in the numeric display.
Select the decimal precision to use when displaying the value.
Select this check box to have the numeric display continue to display the final entity value after the end of the run.
If you do not select this check box, the numeric display "goes blank" at the end of the simulation and does not display any value.
Select this check box to display the name of the associated entity on the numeric display. If you do not select this check box, only the entity's value appears on the numeric display.
Tip: If you do not select this check box, you can place the numeric display next to the icon for the associated model entity to create an elegant diagram-level output device.
Select this check box to display a navigation ( ) button on the numeric display.

When you click the navigation ( ) button, the software displays the Model layer and highlights the icon for the associated entity.